
SENEYE FAQ- PRODUCTS HELP
SENEYE USB DEVICE
|
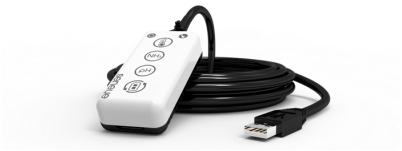
Your seneye device is designed to be simple to use while being strong and reliable.
It comes in three versions and you can learn more about them on the following links; seneye home, pond and reef. You can compare the different features on this link and even see what the different seneye.me dashboards look like on the seneye.me demo pages. The seneye unit is designed to be submersed in the aquarium, ponds, filter or sump you wish to monitor. All seneye monitor, pH, temperature, NH3, light and water line (level). We look at every reading we receive from your device and if there is a problem we will be sure to let you know via SMS and email. |
|
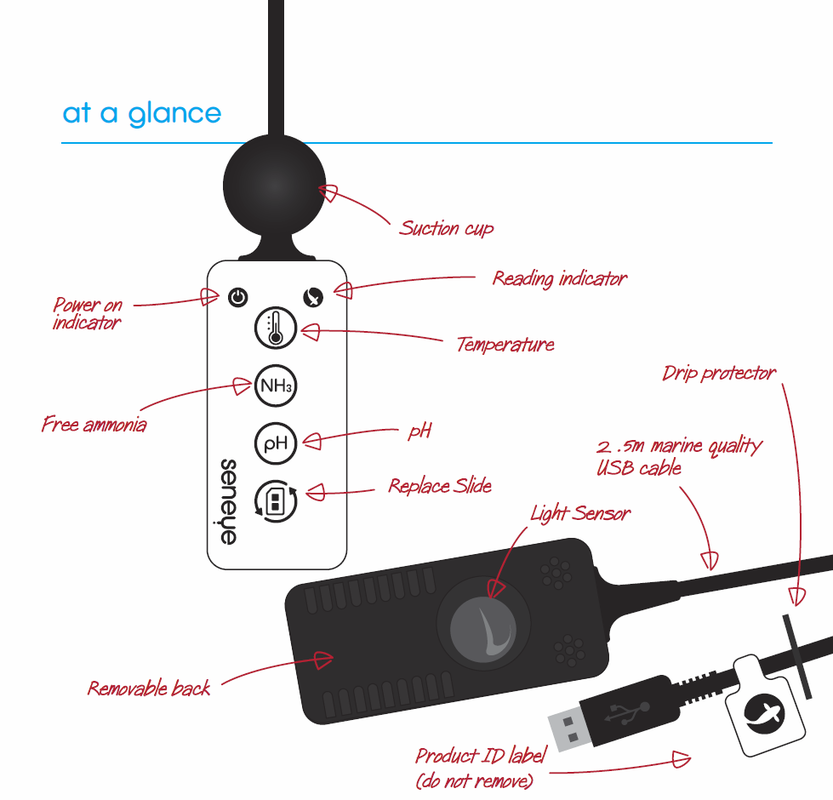
It has four basic parts - the main sensor body, the back, the seneye+ slide and the suction cup. The back, suction cup and slide can all be replaced if needed and are avalaible from our store should you need new ones.
When taking light readings, the device should be moved around the aquarium to show differences in light levels; the reef version adds extra light readings.
When taking light readings, the device should be moved around the aquarium to show differences in light levels; the reef version adds extra light readings.
USING SENEYE CONNECT SOFTWARE APPLICATION (SCA)
|
The Seneye connect application SCA, is free software created by Seneye to allow data from your seneye device to be sent up to your personal seneye.me web site. Using the combination of your home PC and a Seneye USB device offer an innovative low cost way to connect your aquarium to the internet. You can follow the simple setup guide here.
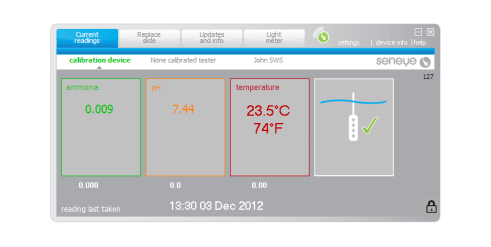
Before downloading and installing the SCA software you will need to register an account on seneye.me. Remember to keep your account logon details written down in a safe place. Once installed the Seneye connect will appear similar to below. There is often a small amount of time from when you initially launch the application that you will see egg timers, these will clear once the Seneye device sends a reading to the software. The SCA will then display the values for the water in the boxes. |

|
|
When installed the SCA software you were asked to name any new seneye device attached.
The computer above has two seneye devices directly attached to it shown in green and a greyed out device 'Device 1' on the same seneye account but not connected to this computer. The name shown in bold green are the readings we are being shown at present. The small grey arrow beneath the names will move as the devices are communicated with in sequence. You can use mutiple seneye's on mutiple computers all attached to the same seneye.me account. |
|
BELKIN HOME BASE SETUP
The Belkin homebase allows For the connection of the seneye device to your computer, over your wireless network. The following page gives and overview of the setup but the product does come will full instructions.
The Belkin comes with the following contents in the box:
In order to run the system, you will need:
Connect your Home Base to your router via the network cable
Plug the Home Base power supply
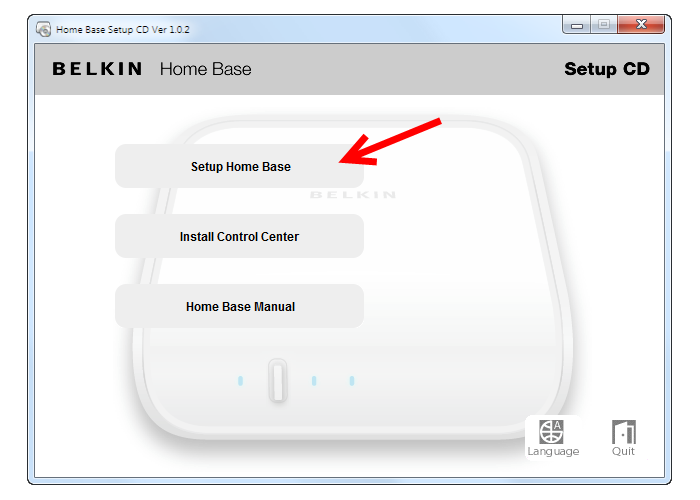
Stage two - Insert the installer CD
Choose 'Set Up Home Base'
The Belkin comes with the following contents in the box:
- Home Base
- Network Cable
- Power Supply
- Installation CD
In order to run the system, you will need:
- A wireless router
- A windows computer
- The Home Base is 'unsupported' on windows 7 and greater. This does not mean that the product does not work with windows 7, just that if you have problems Belkin do not support the product.
Connect your Home Base to your router via the network cable
Plug the Home Base power supply
Stage two - Insert the installer CD
Choose 'Set Up Home Base'
Follow the wizzard that appears

Stage 3 - Install the control center software
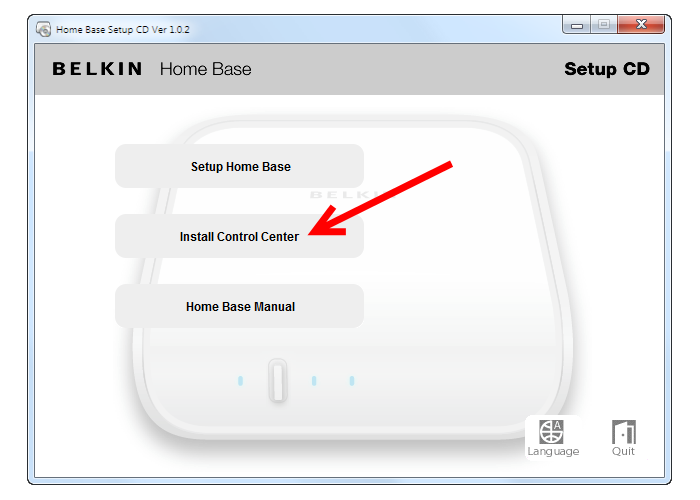
This will then automatically run the software and should find the belkin on you network.
Stage Four - Connect your seneye device to the belkin
Your seneye should show up on the control center as below - double click on it to connect
Stage Four - Connect your seneye device to the belkin
Your seneye should show up on the control center as below - double click on it to connect

You Seneye is now connected to your computer via the Belkin Home base.